Rotatable object guide
To align slides according to the DIC gradient or the image edges of the camera, it is necessary to rotate the slides on the stage. If you - like me - do not have a rotation stage at your disposal, you have to come up with something…
I have constructed a rotatable object guide, which can easily be manufactured with a simple 3D printer. The following properties were taken into account:
- low height - thus collisions with the objectives are excluded
- mounted to the stage, so that the specimens can still be moved
- specimen rests directly on the stage - no problem with focusing the condenser / Köhler is possible
- easy insertion and removal of the slide
- different dimensions of the slides possible due to spring holder
- insertion of the commercially available plastic Petri dishes with 7 cm diameter possible; additional circular recess for the use of the lids of the Petri dishes (whose height is somewhat smaller, so that no collision with the 10 objective can occur)
The object guide consists of two separate parts:
- a rotating frame which is fixed to the stage with the usual fixing screws
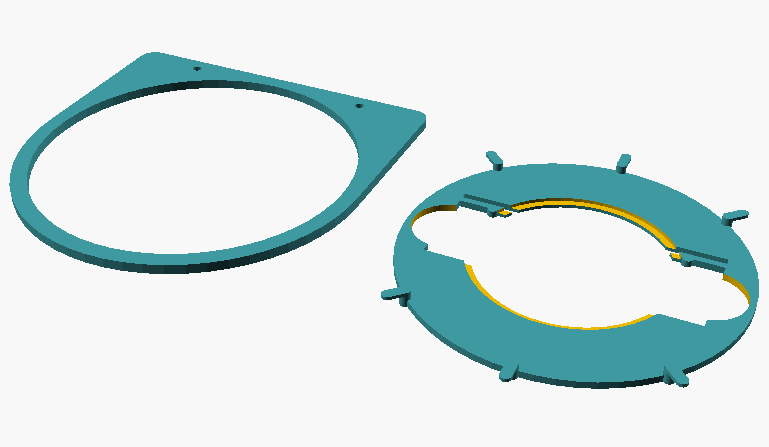
- a turntable which is placed in the frame and can be rotated in it. To facilitate the rotation, the turntable rests on the frame only at six points. The turntable is equipped with six handles so that it can be easily operated from all sides

Fig. 1: Individual parts of the specimen guide; on the left, frame that is mounted to the stage; on the right, the turntable that holds the slide or Petri dish.
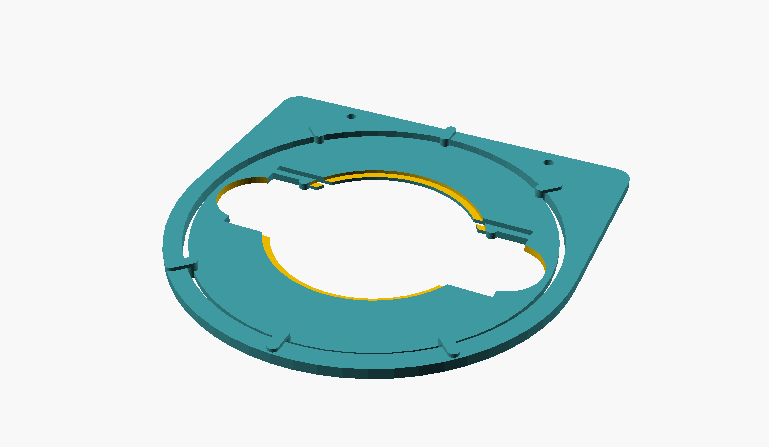
The two parts are inserted into each other. The slide sits firmly in the recess and can be rotated 360 degrees and oriented as desired. The round recesses are provided for Petri dishes, if necessary.

Fig. 2: assembled object guide
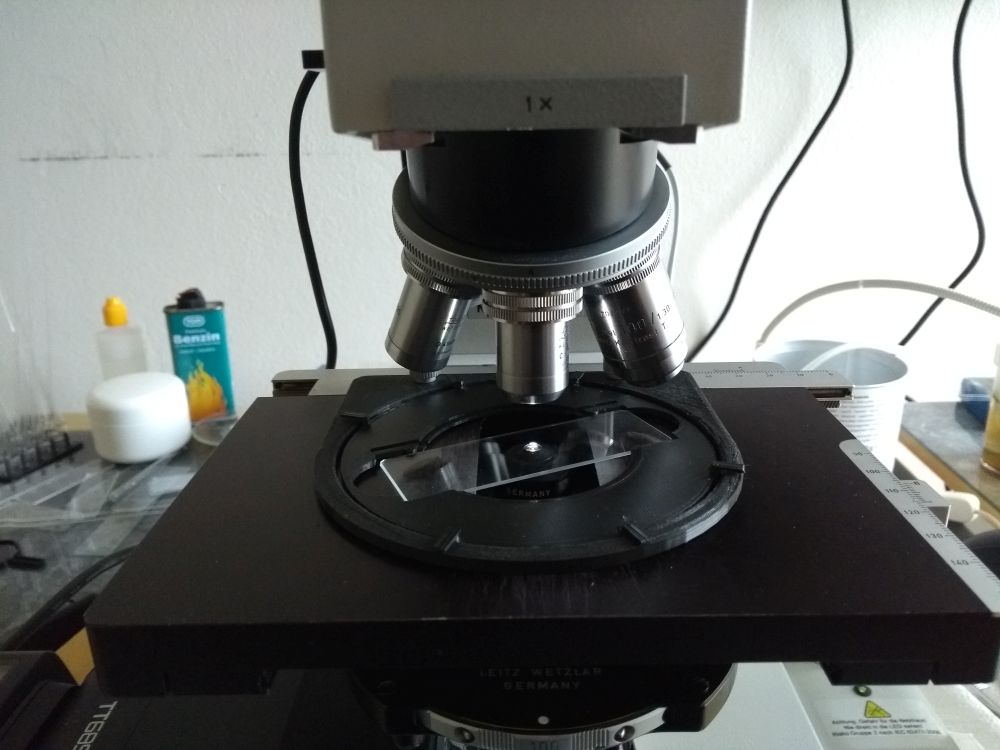
At the microscope the whole thing looks like this:

Fig. 3: Rotatable object guide on microscope
This design has proven itself in practice. Of course, the rotary stage cannot be centered when rotating, the position of the specimen must be readjusted by the stage. The slides fit tightly enough so that there is no “slippage” at all when moving them. However, some slide marks seem to have a slightly smaller depth, so one wishes they would sit a little tighter on those. If you want to use such slides, you have to adjust the retaining springs a bit….
The corresponding print files - including the CAD files in OpenSCad format can be downloaded from Thingiverse. The design is adapted to the stage of my Ortholux II. For other microscopes, the position or diameter of the holding screws may have to be adjusted.
I would not like to miss this practical object guide anymore. Only by rotating the object to the optimal angle is it possible to achieve, for example, optimal contrasting with DIK. Also the alignment at the photo edges saves the constant turning of the camera.